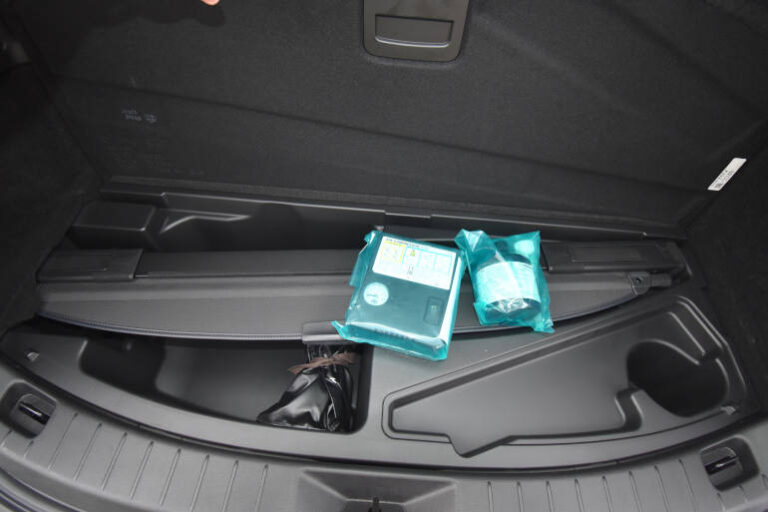
As vehicle designs evolve, so too do the tools provided for managing roadside emergencies. One notable change in recent years is the growing number of fleet vehicles delivered without a traditional spare tyre. Instead, many now come equipped with a tyre repair kit (also known as a tyre mobility kit or tyre inflator kit).
While these kits save space and reduce vehicle weight—contributing to fuel efficiency and emissions reductions—they introduce a new set of training requirements for drivers. For Fleet Managers, it’s critical to ensure drivers understand how these kits work, when they’re appropriate to use, and when to call for help.
Why Manufacturers Have Ditched the Spare
Many manufacturers have phased out the spare tyre to:
- Reduce overall vehicle weight (improving fuel economy and emissions)
- Lower manufacturing costs
- Create more storage space
- Promote the use of temporary solutions to get vehicles to a repair centre
Instead, they include a tyre repair kit, usually made up of an air compressor and a canister of tyre sealant.
How Tyre Repair Kits Work
A tyre repair kit is designed to temporarily seal small punctures in the tyre tread (typically up to 6mm in diameter) and reinflate the tyre so the vehicle can be driven safely to a service centre. These kits do not fix sidewall damage, large punctures, or blowouts.
Most kits include:
- A sealant bottle filled with latex-based or polymer gel
- A 12V air compressor that plugs into the vehicle’s power socket
- A hose system to inject sealant into the tyre and inflate it
Driver Training: What Fleet Managers Should Cover
When onboarding new drivers or transitioning the fleet to vehicles with repair kits, your training should focus on:
- Understanding the limitations of tyre repair kits
- Recognising when a tyre is repairable using the kit
- How to use the kit safely and correctly
- The importance of contacting roadside assistance if the repair fails
Training can be delivered through in-person demonstrations, quick-reference cards in the glovebox, and instructional videos tailored to the kit brand.
Step-by-Step Guide to Using a Tyre Repair Kit
If the tyre has a small puncture and the sidewall is intact, the driver can follow these general steps:
- Find a safe location – Pull off the road to a flat, safe location away from traffic. Apply the handbrake, turn on hazard lights, and ensure the vehicle is in ‘Park’ or in gear.
- Check the tyre – Look for obvious signs of damage. If the sidewall is torn or the rim is cracked, do not use the repair kit—call roadside assistance.
- Prepare the kit – Take the repair kit from its storage compartment. This is usually in the boot, under the floor, or in a side compartment.
- Attach the sealant – Screw the sealant canister to the compressor (if they’re separate) and attach the hose to the tyre’s valve stem. Some systems inject sealant and inflate simultaneously; others require a two-step process.
- Turn on the compressor – Plug the compressor into the 12V socket inside the vehicle and turn it on. The sealant will be injected first, followed by air to inflate the tyre.
- Inflate to correct pressure – Watch the gauge and stop inflating once the tyre reaches the manufacturer’s recommended pressure (found on the driver’s door frame or fuel flap). This usually takes 5–10 minutes.
- Drive to distribute the sealant – Drive the vehicle slowly for 5–10 km (no faster than 80 km/h). This helps spread the sealant evenly inside the tyre.
- Recheck the pressure – Stop again in a safe place to check the tyre pressure using the compressor. If pressure has dropped, the repair hasn’t held—call roadside assistance.
Important Reminders for Drivers
- Only use the kit for small punctures in the tread area.
- Do not exceed the speed limit specified in the repair kit instructions, typically 80 km/h.
- Repairs are temporary. The tyre must be inspected and repaired or replaced by a professional as soon as possible.
- Sealant has an expiry date. Fleet Managers should include sealant checks in scheduled maintenance programs.
- Using the sealant may render the tyre unrepairable, depending on the product. Be aware this could increase replacement costs.
Why Your Final Step Should Be Roadside Assistance
Despite their convenience, tyre repair kits are not foolproof. They’re meant to get you to a service centre—not replace professional repairs. If:
- The tyre is too damaged
- The repair doesn’t hold
- The driver is unsure or uncomfortable
…the best course of action is to call your fleet’s roadside assistance provider immediately.
Providing this clear direction helps avoid further damage, delays, and risk to the driver.
Final Thoughts for Fleet Managers
Switching to tyre repair kits requires a mindset change across the fleet. A flat tyre is no longer a simple wheel swap—it’s now a matter of training, confidence, and good judgement.
Your responsibility is to make sure drivers understand when and how to use the kits—and that roadside assistance is always a safe backup plan.


